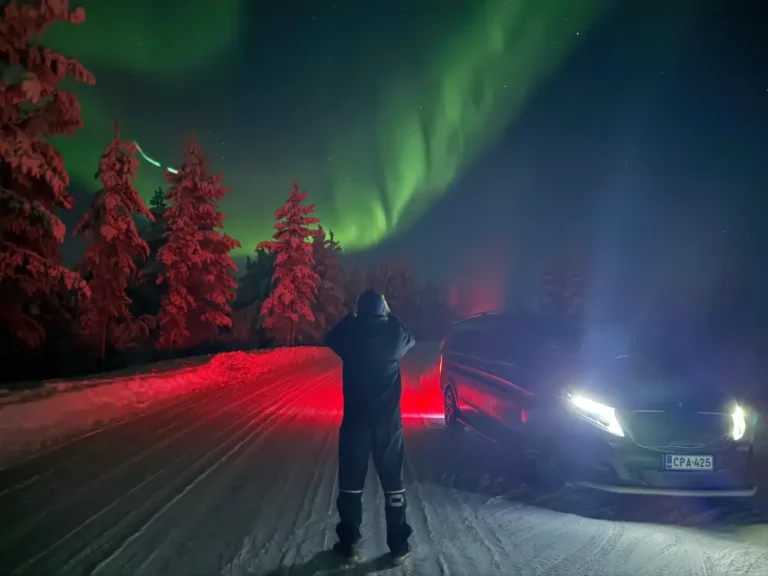
Dressing correctly for a Northern Lights safari in Saariselkä is not just about comfort, it can make the difference between a magical evening under the Arctic sky and a miserable one spent shivering in the cold. Temperatures in Finnish Lapland during the aurora season regularly drop to minus 20°C or colder, and when you are standing still outdoors waiting for the lights to appear, the cold reaches you faster than you expect.
This guide walks you through exactly how to dress for a private aurora hunting experience in Saariselkä, from choosing your base layer to protecting your fingers during a photography stop. Follow these steps before your tour and you will be warm, comfortable and ready to enjoy one of nature’s most extraordinary spectacles. Explore Northern Lights tours with Private Snow Safaris to see what a private aurora experience in Lapland looks like.
Check the Conditions Before Choosing Your Layers
Before you pack your clothing for the evening, check the forecast for Saariselkä. Arctic weather is variable, and the temperature on a clear night, which is exactly what you want for aurora hunting, will almost always be colder than a cloudy one. Clear skies allow heat to escape rapidly, so a night that looks mild on paper can feel significantly harsher once you are standing in an open field away from shelter.
Look at two things specifically: the air temperature and the wind speed. Wind chill can make a minus 15°C night feel like minus 25°C or colder. This distinction matters when you decide how many mid-layers to add and how heavily to insulate your extremities. A calm, clear night at minus 20°C is very manageable with the right layers. A windy night at minus 10°C can be more punishing.
Use the temperature and wind reading together to decide whether you need a lighter or heavier configuration for the evening. If in doubt, add an extra layer, you can always open a zip or remove a glove liner for a moment, but you cannot add warmth you did not bring.
- Check the local Saariselkä forecast on the evening of your tour, not just the day before
- Note both the air temperature and the wind chill figure
- If the forecast shows wind above 5 m/s, treat the effective temperature as at least 5 to 10 degrees colder
- Clear skies mean colder ground temperatures, plan accordingly
Layer Your Base, Mid, and Outer Clothing Correctly
The three-layer system is the foundation of dressing for Arctic conditions. Each layer has a specific job, and the system only works when all three are present and chosen correctly. Skipping a layer or substituting the wrong material will undermine the entire setup.
Base Layer: Moisture Management
Start with a thermal base layer that sits directly against your skin. Its job is to move moisture away from your body so that sweat does not cool you down. Choose merino wool or a synthetic moisture-wicking fabric. Avoid cotton entirely, it absorbs moisture and holds it against your skin, which accelerates heat loss in cold conditions.
- Put on a long-sleeve thermal top and thermal leggings as your first layer
- Make sure the fit is snug but not tight enough to restrict circulation
- Choose merino wool for natural warmth and odour resistance, or a synthetic base layer for faster drying
Mid Layer: Insulation
Add a fleece jacket or a down insulation layer over your base. This layer traps warm air close to your body and provides the bulk of your thermal protection. A mid-weight fleece works well in moderate cold. For temperatures below minus 15°C, a down or synthetic-fill insulated jacket gives you more warmth for the weight.
- Put on a fleece or insulated jacket over your base layer
- For very cold nights, add a second fleece or a lightweight down vest underneath the jacket
- Make sure the mid layer allows free arm movement, you will be getting in and out of vehicles and potentially handling a camera
Outer Layer: Wind and Weather Protection
Finish with a windproof and waterproof outer shell. This layer does not need to be heavily insulated on its own, its purpose is to block wind and protect your inner layers from snow or moisture. A ski jacket and ski trousers work well. Make sure the jacket has a hood and that the trousers are fully waterproof, as you may sit or kneel in snow during photography stops.
Once all three layers are on, check that there are no gaps at the wrists, waist or neck where cold air can enter. These are the most common points where heat escapes.
Protect Your Extremities from Arctic Cold
Your core stays warm longer than your hands, feet and face. In Arctic temperatures, extremities are the first to suffer and the hardest to warm back up once they get cold. This section of your preparation deserves as much attention as your main clothing layers.
Hands are particularly vulnerable during aurora photography, when you may need to remove gloves to operate a camera. Plan for this specifically rather than assuming your main gloves will be enough.
- Hands: Wear a thin glove liner underneath a large, heavily insulated mitten or glove. You can remove the outer glove briefly for camera work while the liner keeps your fingers protected
- Feet: Wear wool socks, at least one pair, ideally two thin pairs rather than one thick pair, inside waterproof, insulated winter boots rated to at least minus 30°C. Make sure the boots are not too tight, as compression reduces circulation and makes feet colder
- Head: A warm hat that covers your ears is essential. A balaclava or neck gaiter adds significant protection for your neck and lower face
- Face: In wind or very low temperatures, cover your cheeks and nose with a balaclava or a buff. Exposed skin at minus 20°C in wind can become uncomfortable within minutes
After putting on your full outfit, move around briefly to check that your circulation is not restricted anywhere. Cold feet on an aurora safari are almost always caused by boots that are too tight rather than boots that are too thin.
What Private Snow Safaris Provides, and What to Bring Yourself
One of the practical advantages of a private aurora hunting tour with Private Snow Safaris is that thermal outerwear is provided for guests. This means you do not need to travel to Lapland with a full Arctic wardrobe in your luggage, the company supplies insulated coveralls, boots and other essential outerwear suited to the conditions on the night of your tour.
However, the layers you wear underneath the provided outerwear are your own responsibility, and they matter. The thermal coveralls go on top of whatever you are already wearing, so arriving in thin clothing will still leave you cold underneath. Think of the provided gear as your outer shell and insulation layer, and dress your base and mid layers yourself before the tour.
Here is a clear breakdown of what to expect:
- Provided by Private Snow Safaris: Insulated thermal coveralls, winter boots, and outerwear appropriate for Arctic temperatures
- Bring yourself: Thermal base layer top and leggings, mid-layer fleece or insulated jacket, wool socks, glove liners, a warm hat, and a neck gaiter or balaclava
- Optional but recommended: Hand warmers for extra heat during photography stops, a thin touchscreen-compatible glove liner if you plan to use a smartphone
If you are unsure what to pack or have questions about the specific conditions during your visit, contact Private Snow Safaris before your tour. The team can advise you based on the forecast and the time of year you are travelling.
Ready to book your evening under the Arctic sky? Book a private aurora hunting tour and the team will confirm all the details, including what to wear and what to bring.
Adjust Your Outfit for Photography and Comfort During the Safari
Dressing well for the journey out is one thing. Managing your clothing during the actual tour, when you are moving between a warm vehicle and cold outdoor stops, is a separate skill that many first-time visitors to Lapland overlook. The temperature difference between the inside of a heated vehicle and the outside air can be 30°C or more, and transitioning between the two repeatedly over an evening requires some adjustment.
The most important thing to manage is ventilation during warmer moments and full coverage during cold stops. Overheating inside the vehicle and then stepping out into minus 20°C while damp from sweat is one of the fastest ways to feel cold during the tour.
- When inside the vehicle, open your outer layer slightly or unzip your mid layer to avoid overheating and sweating
- Before stepping outside at a viewing stop, close all zips, pull up your hood, put on your full gloves and cover your face
- At photography stops, have your camera or phone ready before you step out so you spend less time with bare hands in the cold
- Use hand warmers inside your gloves during longer outdoor stops, activate them before you leave the vehicle so they are already warm when you need them
- If you feel cold in your feet, move them actively, stamp, flex your toes, and shift your weight. Movement drives blood back into the extremities
For photographers, consider keeping your camera inside your jacket between shots to prevent the battery from draining in the cold. Cold temperatures reduce battery life significantly, and a spare battery kept warm in an inner pocket can extend your shooting time considerably.
With the right layering, protected extremities and a few practical adjustments during the tour, you will be well equipped to enjoy the full experience of private aurora hunting in Finnish Lapland, however long the lights decide to dance. Discover our Northern Lights tours to learn more about what the experience includes, or book your private aurora hunting tour and start planning your Lapland adventure for 2026.