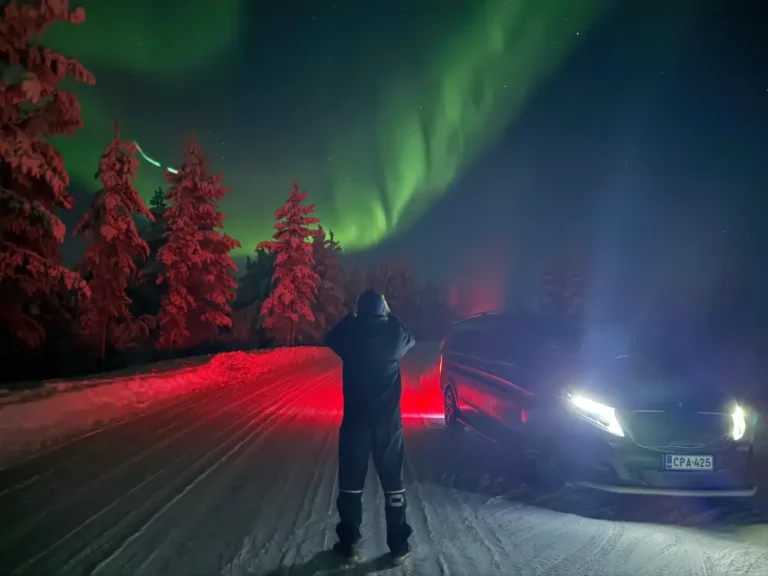
The Northern Lights are one of the most breathtaking natural phenomena on Earth, but photographing them successfully takes more than pointing your camera at the sky and hoping for the best. On a private aurora hunting tour in Finnish Lapland, you have a real advantage: a knowledgeable local guide, a dark wilderness location away from light pollution, and the flexibility to stay as long as the display demands. This guide walks you through exactly what to do, from the moment you prepare your kit to the instant you press the shutter in sub-zero Arctic darkness.
Whether you are a seasoned photographer or picking up a camera for the first time on this kind of trip, these steps will help you capture images you are genuinely proud of. Explore our Northern Lights tours to see how a private experience sets you up for the best possible conditions, then read on to make the most of every moment under the Arctic sky. Ready to secure your spot? Book a private aurora hunting tour before you dive into the technical details below.
What You Need Before the Tour Starts
Preparation is everything when you are heading into the Arctic wilderness after dark. The right equipment, charged and ready, makes the difference between a frustrating evening and a memorable one. Do not leave kit decisions until the last minute, because once you are standing in a snowy forest at minus twenty degrees, there is no going back to the hotel to grab a forgotten cable.
Your camera needs to be capable of shooting in full manual mode. A mirrorless or DSLR camera gives you the control you need. Smartphones can capture faint aurora displays, but they struggle with the full dynamic range of a strong display and do not give you the same creative flexibility. A wide-angle lens with a maximum aperture of f/2.8 or wider is the ideal choice for gathering as much light as possible in a short exposure.
Gather everything on this list before you leave your accommodation:
- Camera body capable of manual exposure control
- Wide-angle lens, ideally f/2.8 or faster
- Sturdy tripod with a ball head that operates smoothly in cold temperatures
- At least two fully charged camera batteries (cold drains batteries fast)
- A remote shutter release, or use your camera’s built-in timer to avoid camera shake
- Spare memory cards with plenty of free space
- A small headlamp with a red-light mode to preserve your night vision
- Thin inner gloves that allow you to operate dials, plus warmer outer mitts for when you step back
Once your kit is packed and double-checked, you are ready to focus on the technical side. With gear sorted, the next step is dialling in the right camera settings before you reach your viewing location.
Set Your Camera for Dark Arctic Conditions
Configure your camera settings at home or in the vehicle before you step out into the cold. Fumbling with menus in the dark while wearing gloves wastes precious time and risks missing the opening moments of a display. Getting your baseline settings right in advance means you arrive at the shooting location ready to shoot within seconds.
Aurora photography is long-exposure work. Your goal is to let enough light onto the sensor to reveal the colours and structure of the lights without blurring the stars or overexposing a bright display. Start with these baseline settings and adjust from there:
- Set your lens to its widest aperture, for example f/2.8 or f/1.8, to maximise light intake.
- Set your shutter speed to between 5 and 15 seconds. A faster aurora display needs a shorter exposure to keep the shapes sharp; a slow, drifting display can tolerate a longer one.
- Set your ISO to 1600 as a starting point. If the scene looks too dark in your test shot, increase to 3200. If it looks washed out or grainy, reduce it.
- Switch your lens to manual focus, then focus on a distant bright star or a far-off light source until it appears sharp. Lock that focus and leave it.
- Set your image format to RAW if your camera supports it. RAW files give you far more flexibility when editing colours and exposure afterwards.
- Enable your camera’s two-second self-timer or connect your remote shutter release to eliminate vibration when you press the button.
Take a test shot as soon as you arrive at your location and review it at 100% zoom on your screen. Check that the stars are sharp points rather than streaks, that the exposure is not blown out in the brightest areas, and that the overall brightness feels balanced. Adjust ISO and shutter speed until the test shot looks close to what you want. You should see a clear, bright image with visible colour in the sky before you start shooting in earnest.
Frame and Compose Your Aurora Shots
Strong composition transforms an aurora photograph from a simple record of the sky into an image with genuine impact. The Northern Lights themselves are spectacular, but a well-composed shot includes a foreground element that anchors the scene and gives the viewer a sense of scale and place. In Finnish Lapland, the landscape offers outstanding natural subjects: snow-covered pine trees, frozen lake surfaces, rolling fells, and the occasional silhouette of a traditional wooden structure.
Position your tripod so that a compelling foreground element sits in the lower third of the frame. The aurora typically occupies the upper portion of the image, so the foreground and sky work together rather than competing. Avoid placing the horizon dead-centre, as this tends to feel static. Instead, give slightly more space to whichever element is more dramatic at that moment.
Consider these compositional approaches depending on what the landscape offers:
- Tree line silhouettes: Position a row of snow-laden pines along the lower edge of the frame to frame the aurora above.
- Frozen lake reflections: When conditions allow, a still, dark section of ice can mirror the aurora for a symmetrical, striking result.
- Open fell view: A wide, unobstructed horizon emphasises the scale of the sky and works well during a full-sky display.
- Human element: Ask a travel companion to stand still during a long exposure. Their silhouette adds a sense of wonder and scale without blurring if they remain completely motionless.
Shoot a variety of compositions during each display rather than fixing on one angle. Aurora displays shift and change quickly, and a composition that worked two minutes ago may be less interesting as the lights move. Variety gives you more options when you review your shots later.
Adapt Your Technique as the Aurora Changes
Aurora displays rarely stay the same for long. A faint green glow on the horizon can erupt into a full-sky curtain of dancing colour within seconds, and an intense display can fade just as quickly. Adapting your settings in real time is one of the most important skills you can develop during a session, and it is also where many photographers lose their best shots by reacting too slowly.
Watch the display for a moment before you adjust anything. Understand whether the lights are moving fast or slowly, brightening or fading. Then respond with your settings accordingly.
- If the aurora suddenly becomes very active and fast-moving, reduce your shutter speed to 2 to 5 seconds to freeze the shapes rather than blurring them into a smear.
- Compensate for the shorter exposure by increasing your ISO, moving from 1600 up to 3200 or even 6400 if the display is bright enough to support it without excessive noise.
- If the display fades to a subtle glow, increase your shutter speed back to 10 to 20 seconds and lower your ISO to reduce grain.
- Shoot continuously during peak activity rather than reviewing images between shots. Review afterwards, not during.
- If the lights shift position across the sky, reframe quickly. Do not be precious about your composition during a fast-moving display; capturing the light matters more than a perfect frame in that moment.
The flexibility of a private aurora hunting session is a genuine advantage here. Because your guide is focused entirely on your group, you can ask them to alert you when a new burst of activity begins, and you can stay at a location as long as the display continues without being rushed back to a vehicle. Use that time and that personal attention to keep experimenting with your settings throughout the evening.
Protect Your Gear in Sub-Zero Temperatures
Cold weather is hard on camera equipment in ways that are easy to underestimate. Batteries lose charge far faster than the manufacturer’s specifications suggest when temperatures drop below minus ten degrees Celsius. Lubricants in lens and tripod mechanisms can thicken and make smooth operation difficult. Most critically, bringing cold equipment into a warm environment too quickly causes condensation to form inside the lens and on the sensor, which can take hours to clear and may damage electronics if repeated regularly.
Follow these habits throughout the evening to keep your gear functional and protected:
- Keep spare batteries in an inner pocket close to your body. Body warmth maintains their charge. Swap them into the camera when the active battery starts to flag.
- Do not breathe directly onto your lens. Moisture from your breath freezes instantly on cold glass and is difficult to remove cleanly in the field.
- When you return to a warm vehicle or building, seal your camera inside a zip-lock bag or camera bag before entering. This allows it to warm gradually and prevents condensation from forming on cold surfaces.
- Leave the sealed bag undisturbed for at least thirty minutes after entering a warm space before opening it.
- If your tripod head becomes stiff, do not force it. Warm it briefly in your hands before adjusting.
Verify that your gear is performing correctly throughout the session by checking your test shots regularly. If images suddenly appear soft or your autofocus confirmation light is behaving unusually, check whether your lens elements have fogged. A lens that has fogged slightly in the cold will produce hazy, low-contrast images even in manual focus mode. If this happens, the only solution is to allow it to warm slowly and clear before continuing.
With the right preparation, correct settings, thoughtful composition, adaptive technique, and protected equipment, you have everything you need to come home with photographs that genuinely do justice to the Northern Lights. A private aurora hunting tour in Finnish Lapland gives you the location, the guide and the time to put all of this into practice without the pressure of a crowded group tour. Discover our Northern Lights tours to understand what a private experience includes, or book your private aurora hunting tour and start planning your Lapland adventure. If you have questions about what to bring, what to expect or how to tailor the experience to your group, get in touch with us and we will be happy to help.